I have emphasized that this project is a learning experience and that it isn’t even necessarily possible to do what I’m trying to do. So I’m bound to do things that don’t work throughout the whole process.
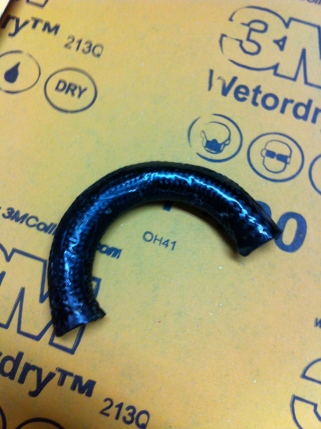
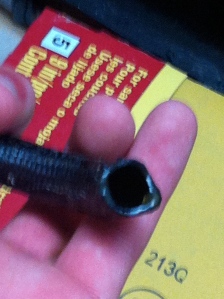
My most recent idea for molding curved parts was to use a wax internal mold. This has many positives, but unfortunately only one thing has to not work for the whole idea to not be possible. The idea is to melt out the wax core once the part has cured, but this relies on the ability to melt out all of the wax. This is unfortunately not possible. I made a test piece that otherwise turned out fairly well, but when I tried melting out the wax, the viscosity of the wax was just too high and a lot of it sticked to the walls of the part. A thick layer of wax will really affect the sound of the trumpet because it drastically changes the shape of the inside of the tube.
Also, in this test I had extra carbon fiber going over the ends of the wax mold, so I had to cut off the ends of the tube before melting out the wax. This meant that the wax got a lot of carbon dust melted into it. I could simply leave the ends of the part open when I mold it and that would fix the problem, but it brings up an issue that I’m still not sure about, which is that I don’t know how long the wax will last being melted and recast over and over. Eventually the wax will probably break down or get very contaminated. This wouldn’t be a problem, but carnauba wax is quite expensive, so it can’t be a largely disposable ingredient.
So my next thought is to use a molding material that is easily dissolvable with hot water, often used to cast parts, and is very cheap. This material is of course sugar! The idea is essentially to make a lollipop in the shape of the inside of the tube, mold the carbon fiber around it, then dissolve it away in hot water. The sugar parts are definitely hard and strong enough for this, but I do have some concerns. Sugar is very sensitive to moisture, so I might need to seal the surface of the sugar before molding to make sure it doesn’t get affected by any moisture. I’m also not sure of the thermal expansion of sugar. The sugar is heated to 300°F before being poured into the mold, so if it contracts significantly when cooled, then the dimensions of the part might be very off.
I think the solution to the moisture problem might be to use a material called isomalt instead of sugar, which is a more stable version of sugar that is used by confectioners to build strong crazy structures. If I recall correctly, the reason why isomalt is better is because you can cook it to much higher temperatures without it caramelizing, so more of the moisture is removed. There may be some other intrinsic reasons it is better also. Isomalt is also very cheap. <$5/lb for isomalt vs >$20/lb for carnauba wax.
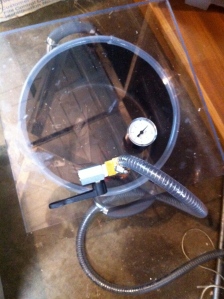
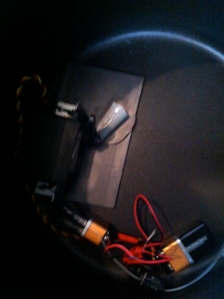
The other thing that I have given up on is my own method of vacuum bagging. I was originally thinking that regular vacuum bagging was a waste of materials and was generally not very good. I thought of another method that simply used ziploc bags that were sealed while in a vacuum chamber. The benefit to this is that you don’t need to leave it connected to the vacuum pump during the cure. The problem with this, as I quickly discovered, is that ziploc bags are not anywhere near airtight. Seconds after letting air back into the vacuum chamber, the sealed ziploc bag starts to lose vacuum and has lots of air in it. This means that there is no pressure on the carbon fiber.
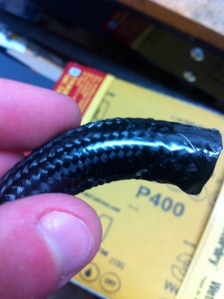
Some portions of the part are well compressed and shiny whereas others are messy looking and actually have holes.
I’ve decided to abandon my own method in favor of the tried and true method of vacuum bagging commonly used. Here is a diagram showing this process:

I will not be using release film and for simple straight tubes I may only need the bagging film and a small amount of breather fabric. Here’s a video that shows the simpler process for basic tubes: https://www.youtube.com/watch?v=8iJH8P9KxAs Luckily these fabrics are quite cheap, likely cheaper than many fabrics at the fabric store. I will describe the process of vacuum bagging and why it works the way it does in a later post.
Yesterday I ordered a bunch of materials and equipment to get this system up and running. I ordered vacuum bagging film, release fabric (I think this corresponds to peel ply in the diagram), sealant tape, breather fabric, a vacuum connector (not cheap!), fancy high density 2×2 twill weave carbon fiber fabric, and some more 1/2″ carbon fiber sleeving. Here’s the items and the prices.
Qty Total/Item Desc
2 11.98 Pink Vac Bagging Film
2 13.98 Vac Release Fabric
2 9.98 Vac Breather Fabric
1 9.99 Vac Bagging Sealant
1 54.99 Vac Bagging Valve
1.33 46.48 #2 3K 2×2 TW 270GSM Aero Very High Density 50in (Qty=yrds)
1 12.2 0.5 inch carbon fiber sleeves (cost for 10ft) Color: Natural

